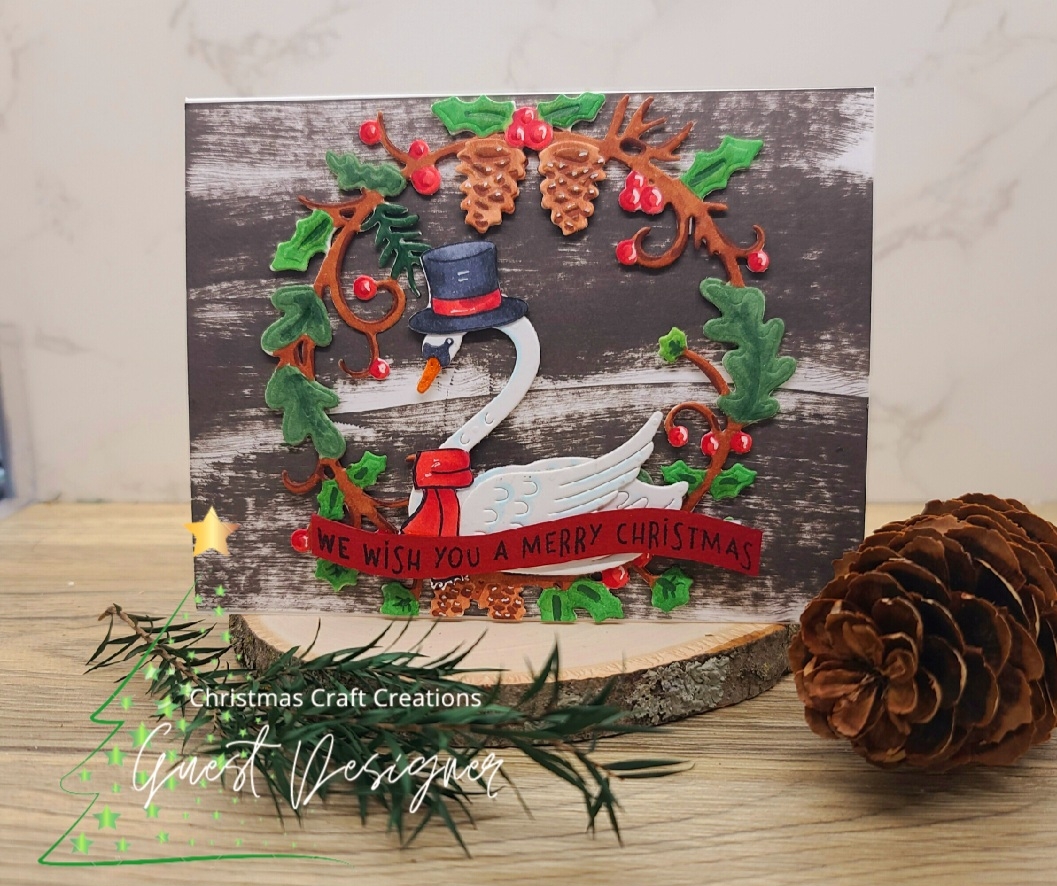
 This is my first blog post as a guest designer for Christmas Craft Creations. If you're new to my blog, welcome! I love Christmas; it is my favorite season. I create Christmas cards all year long so I'm not stressed at the end of the year. I created this card to show you can stretch your products by using a non-holiday focal point and dressing it up.
 This swan is from Spellbinders' Heart Swans die set. I colored him with the following Copics: B000, YR18, and C07. I added the tophat and scarf from Lawn Fawn's Making Frosty Friends
I did "surgery" on the scarf to fit the swan's thin neck. I used R29, R35, C07, and C06.
Pro tip: add a few highlights with a white gel pen to increase the appearance of depth on your projects.
This wreath adds a Christmas feel to the card. It's from Spellbinders' Holly Berry Wreath die set. I cut the wreath out of white cardstock and colored as follows:
Ivy and Holly-G07, YG17, G28
Berries-R29, R35
Pine Cones-E15, E37, E29
Leaves-G28, G46
Pine Needles-G28
Wreath-E29, E39
Pro tip: using more than one green adds depth and interest to the foliage.
I wanted to add a playful touch with this wavy banner from Lawn Fawn's Here We Go A-Waddling set. I stamped and fussy cut it.
Finished card. By adding the hat and scarf, I transformed this romantic swan to one that reminds me of "seven swans a swimming." Take a look at your products and see what you can add or remove to change the feel of your cards. Please stop by Christmas Craft Creations blog to see other creations adding hats here.


Comments
Post a Comment